
Documentation and setup
MapMigo Store Locator
Everything you need to set up, customize, and troubleshoot the MAPMIGO Store Locator app — from first install to advanced settings. Use the sidebar to jump straight to the topic you need.
Enable the app embed block
If you don’t enable the app embed block the app can’t display the map on your store.
To enable this go to Online Store > Themes > Click Edit Theme next to your current Theme.
Now you are in the theme editor. Click App Embeds at the very left > look for MAPMIGO Store Locator Page Embed > Enable the toggle > Click Save at the top right.
This is it.
Locations
To see an overview of all your locations, click the locations tab in the left sidebar.
Here you see a list of all the locations you have added and a preview of the pins.
You can duplicate, edit and delete locations here.
To bulk delete locations, select the checkbox next to the location, then click the delete button on the right to delete the selected locations.
Add Locations
There are two ways to add locations to MapMigo.
You can add them manually one by one or you can do a bulk import of multiple locations.
Manual Adding
To add a location manually you can click “Add Manually”.
Name and address are mandatory. The rest of the fields are optional.
You can also add opening times. Those will be shown when a visitor clicks on a location.
Choose the days this schedule applies to then set the opening and closing times and an optional break.
If some days have different hours, click “Add hours for remaining days” to create additional schedules.
On the right you can check if the pin will be placed in the correct spot. If not, you can drag it to the right position. If it’s totally off, delete the location and add it via bulk import with latitude/longitude.
You can change the map marker. Click Change marker style to pick one of our defaults or upload your own icon.
You have the option to upload a store image. When someone clicks a location, the image shows in the map’s sidebar along with the other details.
Once done, click save at the top.
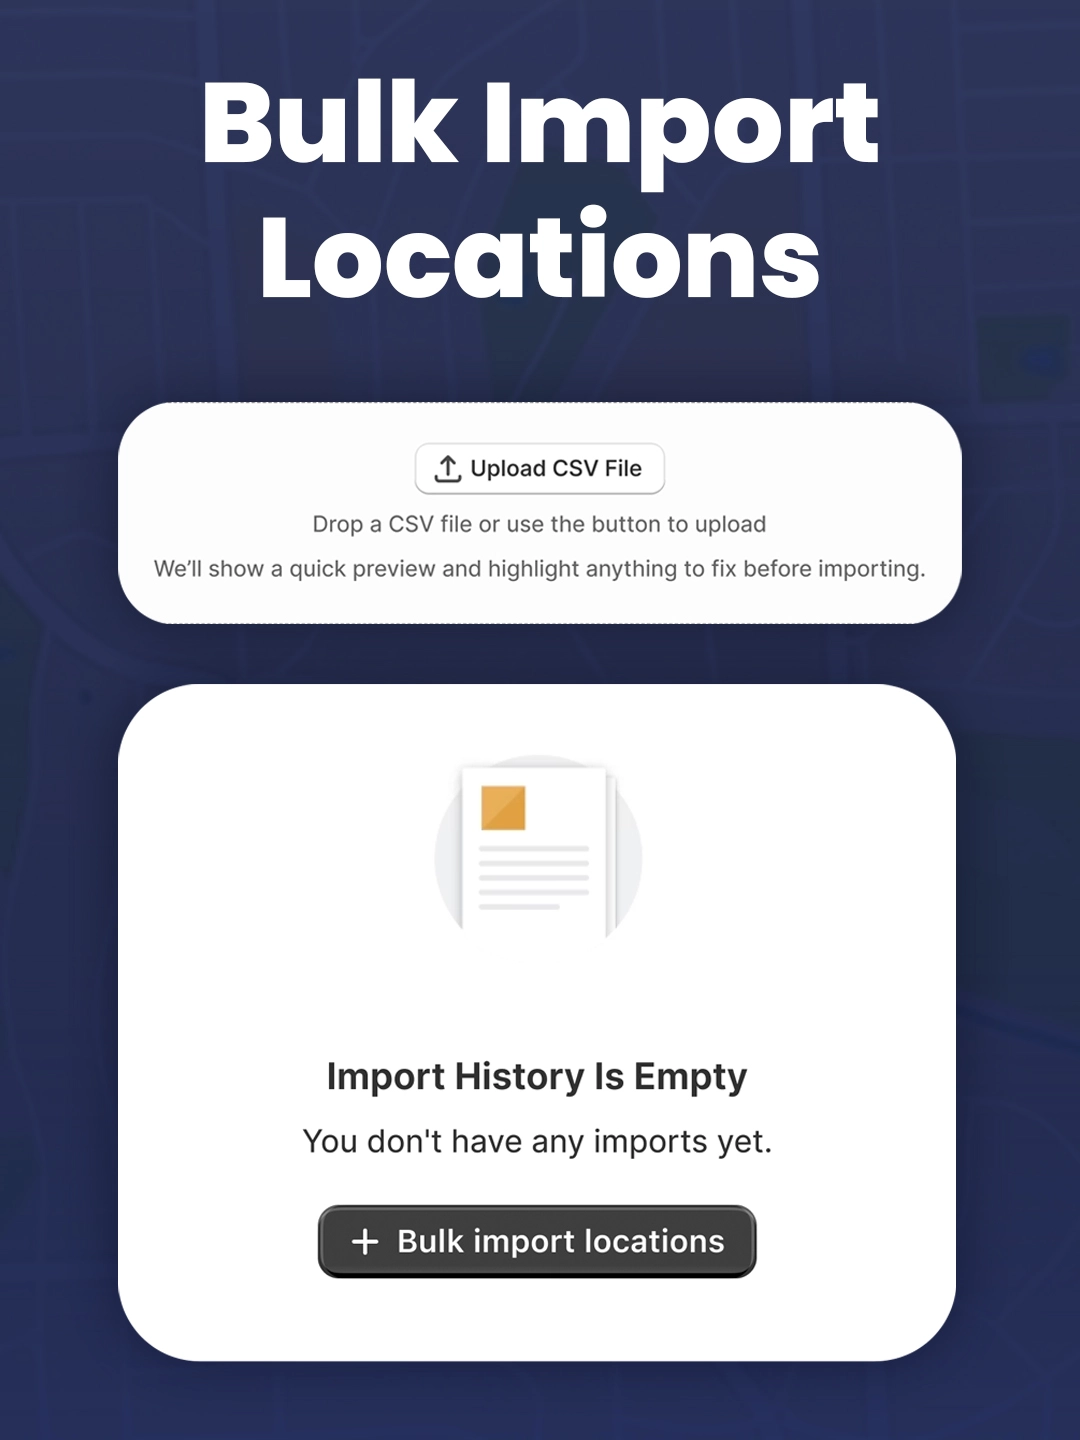
Bulk Import
Click on Bulk Import in the locations tab.
This is a three step process.
1. CSV creation and upload
The app accepts the format CSV for bulk importing. You can easily create this by working in Google Sheets or Excel. When you export the file from these programs, choose CSV as the file type.
We have added a sample file. You can download this to see which format works best for the app. You can also use your own file if you already have one. We use column matching in the second step of the process, so it also works if you don’t exactly follow the sample file structure.
Mandatory columns are: Name, Address, City, Country Code (e.g. US for United States).
Optionally add the following columns: Postal Code, Phone, Email, Website URL, Description, Instagram, Facebook, Tiktok, X, Marker image URL, Location image URL, Latitude, Longitude, Opening Hours.
Explanation Marker image URL: If you want to use custom markers for the locations you add via bulk import, you can do so by going to the Custom Markers & Images tab in the app.
There you can upload location images and markers from your computer. The media has to be smaller than 2 mb.
In the media list, copy the file URL.
Then paste it into the marker image url column in the CSV.
When you import, the app fetches the file from that URL and uses it as the marker on the map.
Explanation Location image URL: it works the same as the marker image URL. Use this if you want to add images to the locations you bulk import.
Explanation latitude and longitude: The app takes the address you provide and tries to find the exact geolocation for the marker based on this. With most addresses this works really well.
If the app can’t find a store’s location, this store will be marked as failed in the third step of the importing process and not imported. You can then download all the failed stores as a CSV.
I’d recommend opening this CSV and seeing what is the issue for each row.
For the columns that have failed because the address couldn’t be found, you can add latitude and longitude.
Do the following:
- Add the column latitude
- Add the column longitude
- For each store that failed because of the geolocation, go to google maps, find the spot, right click and copy the latitude and longitude. Latitude is the first number. Longitude the second.
- Paste these two into the CSV.
Adding latitude and longitude makes sure that the marker will be at the exact right spot.
You can add these two to the CSV if you want to be really sure that the pin is placed 100% correctly.
Finding the locations based just on the address works really well in 95% of the cases though. The only issues I encountered are when the address is very unusual or in developing regions.
Explanation opening hours:
If you want to add the opening hours of your locations, add columns for each day the store is open and fill them.
Use the format 8am-8pm or 08:00-20:00.
To add a break time, use a comma. Let’s say your store is open from 8:30 to 5, but closes 1 hour for lunch, you could write 08:30–17:00, 12:00–13:00 in the column (or 08:30AM – 5PM, 12PM-1PM if you use AM PM).
Once you are done with the CSV, upload it. The app will show a preview and you can go to the next step.
2. Matching the Columns
The app automatically scans the CSV and tries to find the right columns for each field the app accepts. Go through this to make sure that the automatic matching worked correctly.
You can click on the dropdown to match one of your columns to one of the fields the app accepts.
The fields Name, Address, City and Country Code are mandatory.
Prevent duplicates: At the bottom there’s a checkbox to prevent duplicates. If this is activated the app will check if any of the locations you are importing, match one of the existing locations.
It checks if name and address are exactly the same. If this is the case this location will be skipped.
This is helpful if you import a big list of locations and aren’t sure which you’ve already imported before.
Only deactivate this, if you actively want duplicate locations.
Click Start Import.
3. Importing your locations
Now the app imports the locations into the map.
For under 1000 locations this usually takes less than a minute.
If there are any locations that couldn’t be imported you will see an overview and the reason.
The locations that had no issues will be imported anyways.
You can download the failed rows as a CSV. In this CSV you’ll see a reason why each row failed. Then you can fix it and reupload just this list of fixed rows to also import those locations.
This is it.
If you want to see your locations, you can now go to the locations tab.
Import History
If you want to see your past imports, click on import history.
Here you will see all the imports you have done and you can export CSVs of failed locations.
Bulk Export
If you click on bulk export, the app will export a list of all your locations as a CSV.
General Settings
Map load behavior
Load on page load
“Load on page load” means the map appears automatically as soon as the store-locator page opens, no click needed. It delivers the best user experience because the map is visible immediately.
The map loads via your Mapbox account, so it may transmit technical data (e.g., IP address) to Mapbox. For some users this may be a privacy concern. If your privacy setup requires it, make sure you obtain consent or block loading until consent is given.
Click to Load (Privacy Mode)
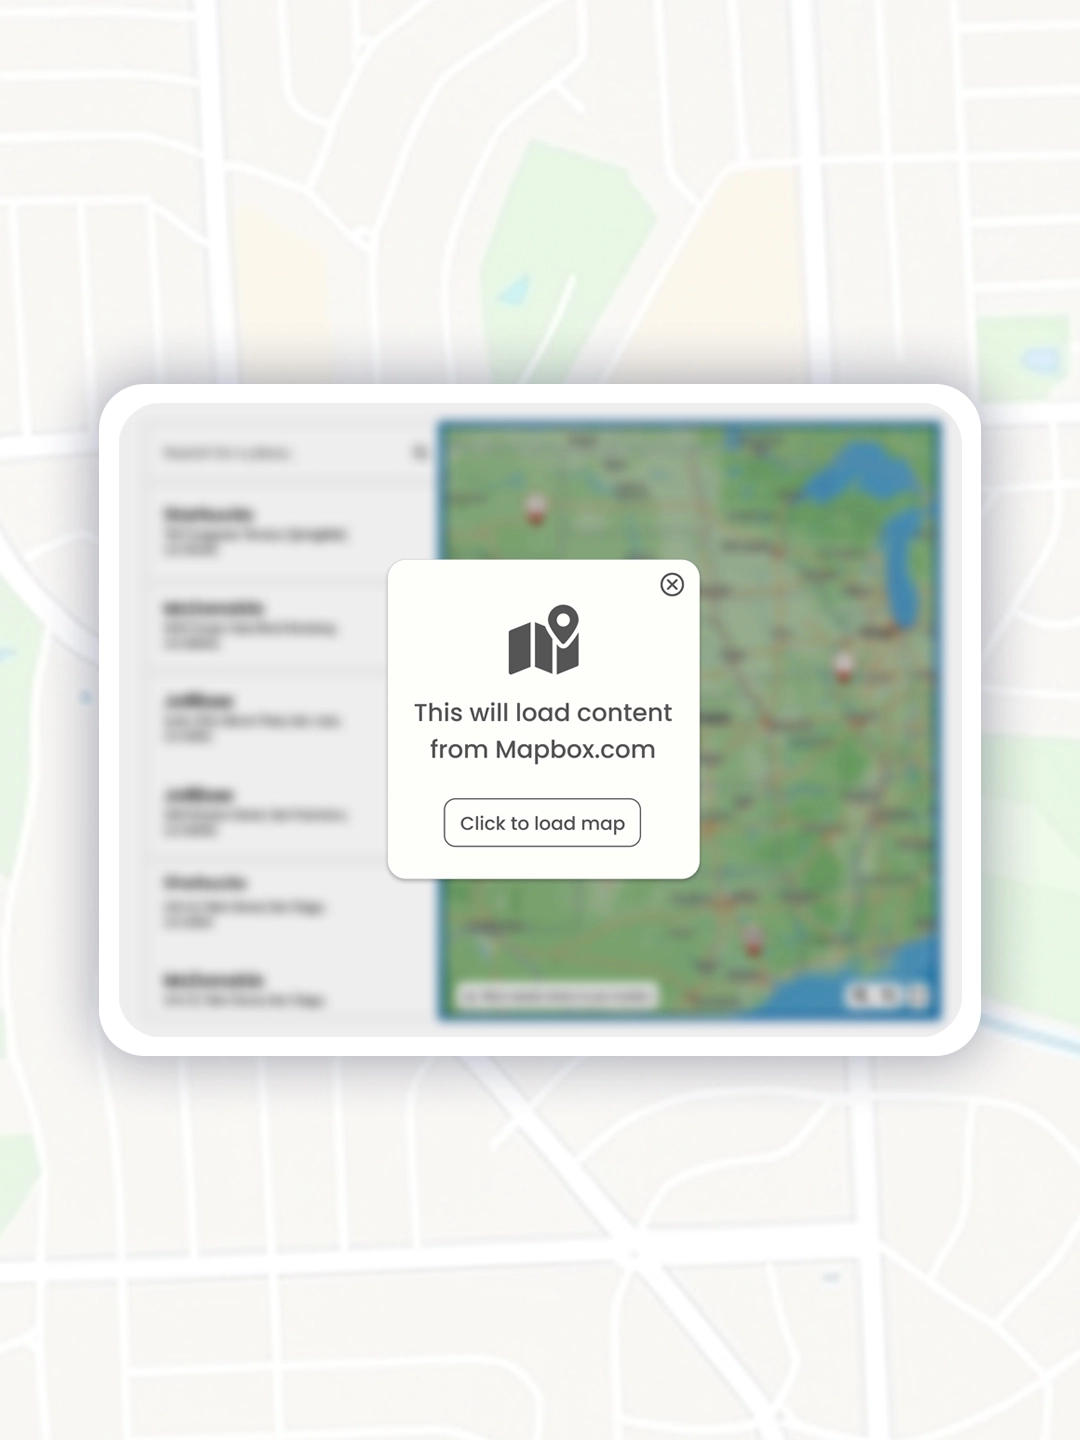
If you select „Click to load“ the map will not load immediately after the store locator page is opened. Instead a banner appears saying „Load the map“ with a button to load the map.
This option exists because loading the map will send technical data (e.g. IP address) to Mapbox. Choose this if you prefer a more privacy-cautious setup.
Default Map Position
You can decide what your map should show when it loads the first time.
The default option is to automatically locate visitors. This will request the location of the visitor in the browser. Most likely they will get such a notification and have to accept it.
Once the app has the location of the visitor, it will zoom to the closest store to that visitor.
If the visitor denies geolocation, the fallback will be showing all locations.
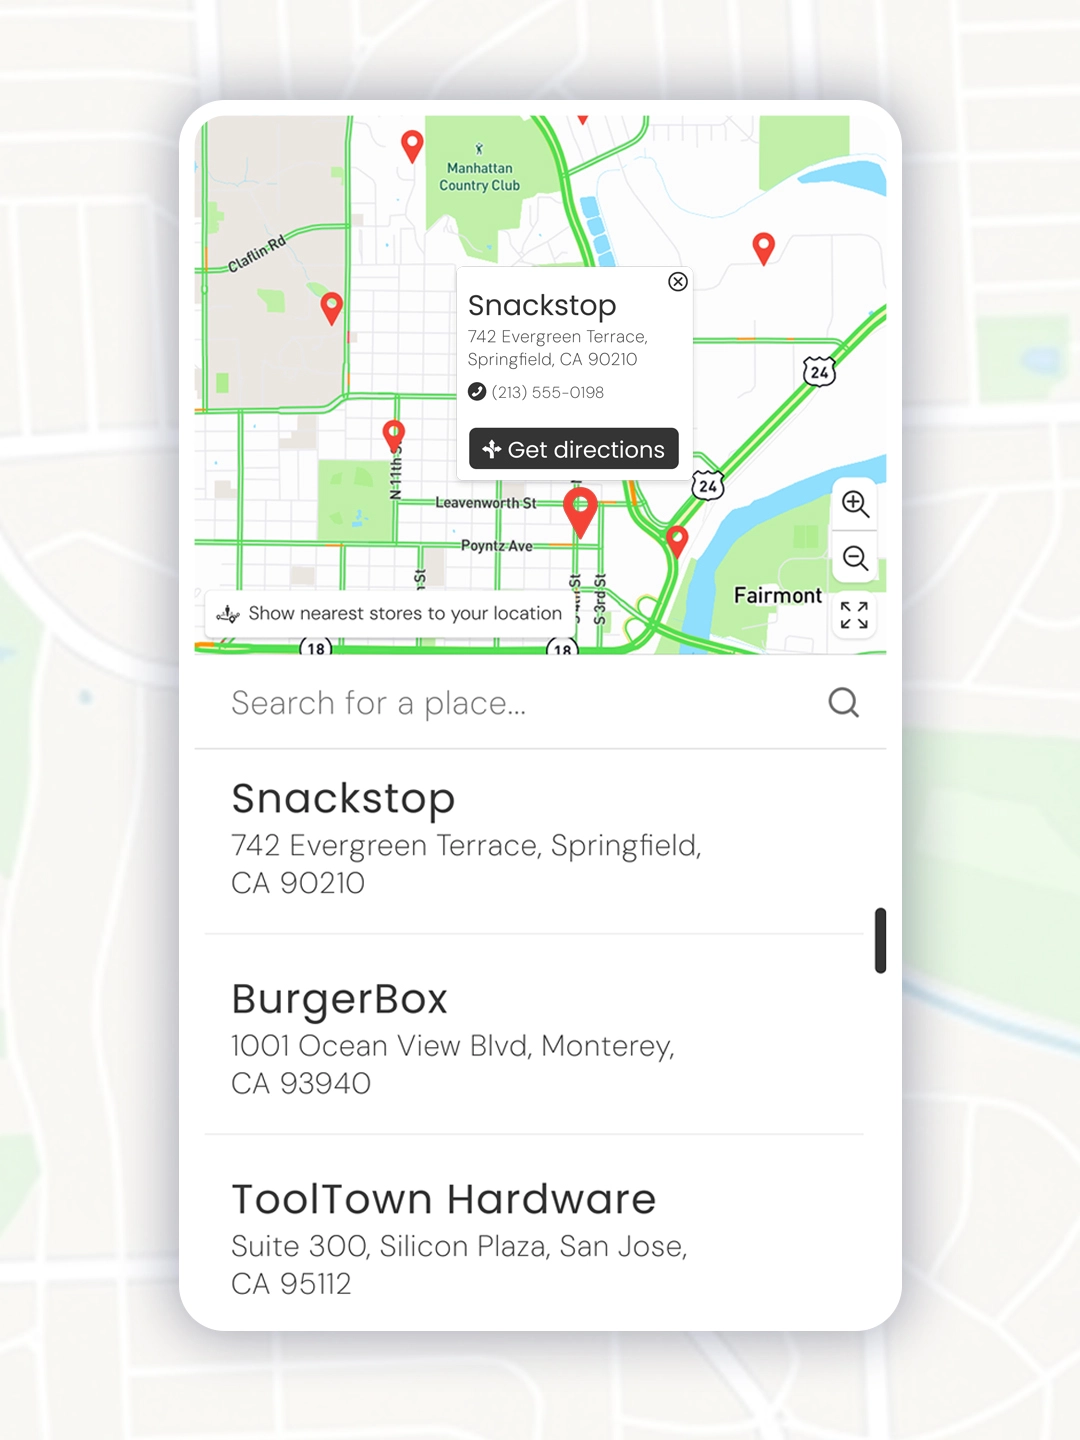
Show all locations is the second option. Here the geolocation is not requested. When the visitor first loads the page, the store locator will be zoomed out so far, that all location pins will be shown.
The user can then either scroll in manually, search in the search bar or use the “Show nearest stores to your location” button.
Distance Unit
If the geolocation feature is used, all stores in the list will be sorted by the distance to the user. It will either be in KM or Miles. Choose which one you prefer.
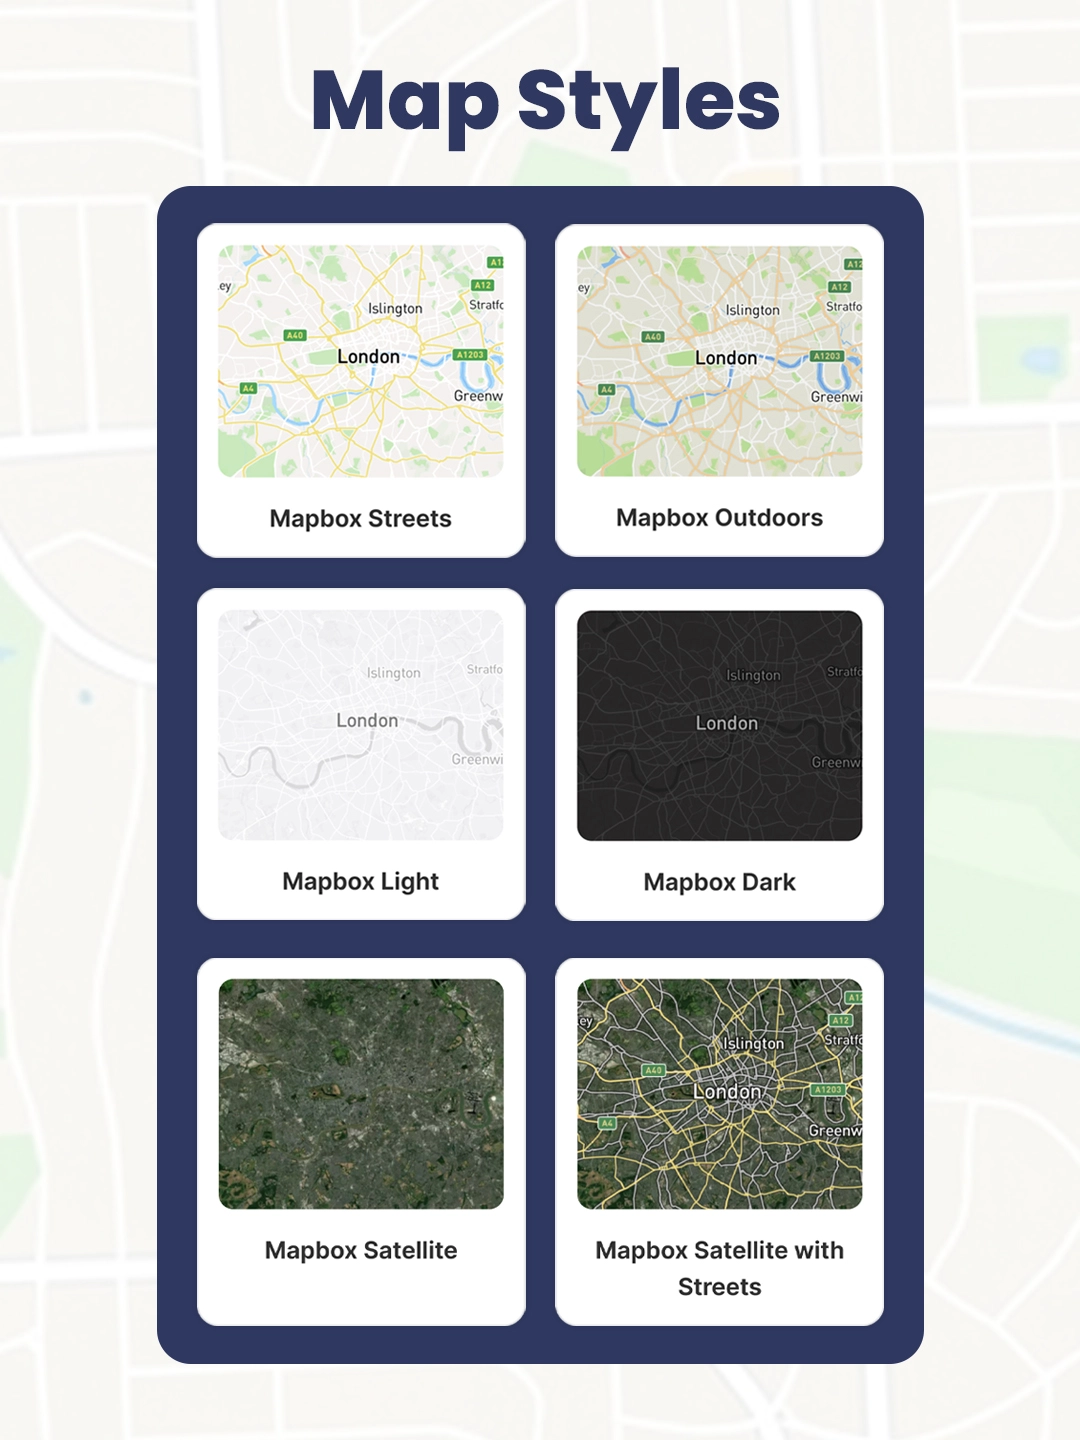
Appearance Settings
Here you can choose a layout for the desktop and mobile.
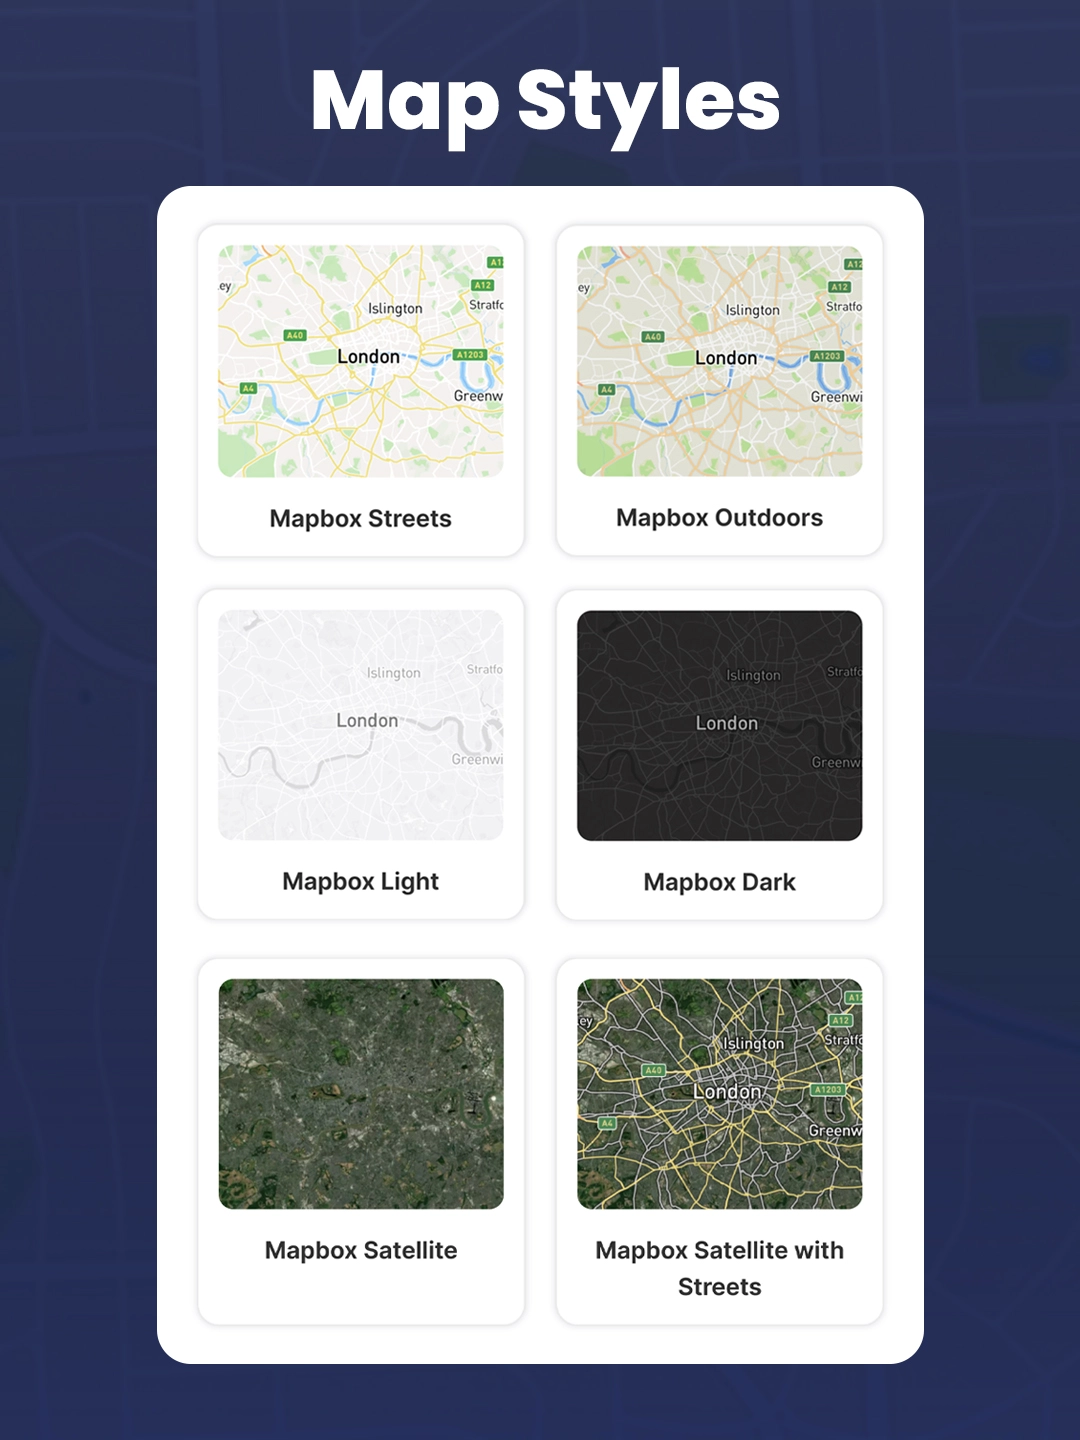
We provide 9 map styles you can choose from. Choose the one that best fits the style of your store.
Next you can choose the color scheme of the locations list. There is a light and dark mode.
We wanted to keep the appearance settings simple. If you need more advanced design settings you can use the custom Code settings box to add CSS and change anything you want. If you don’t know CSS, leave a message in the support chat and I’m happy to help with any customization.
You can customize the width and height of the store locator for desktop and mobile.
Keep in mind that some themes add side padding, so a width of 100% will fit within your theme’s layout rather than spanning the entire screen.
If you have a lot of locations you can turn on clustering. When you zoom out of your map, if clustering is enabled, instead of showing every single pin it will show clustered areas. Once you zoom in, it will show the individual pins. I’d recommend to turn it on, if you have more than 500 locations.
Please Note:
We’ve tested the store locator with most themes, but every theme is a bit different, so rare issues can occur.
If anything doesn’t work or look right, just reach out via the in-app chat—we’ll quickly help you resolve it.
Translation Settings
You can translate all the words that are used in the app.
On the left you see all the words. On the right you can add your translation.
Installing the Store Locator in your shop
Adding the map to an existing page
If you want to add the map to an existing page (e.g. your homepage) you can do so via the theme editor. Follow the steps below or watch the video.
Step by step
- In Shopify click on Online Store.
- Next to your current theme click on customize
- At the top you can select which page or template of the store you want to edit.
- In the left panel click Add Section. Then select „Apps“. Here you will see the MapMigo app block. Click on it.
You can’t edit any settings in the app block. All customization is done in the settings of the app itself. - Save the changes.
- View your page. (Changes may take a moment to appear due to theme caching/CDN.) If anything doesn’t work or look right, just reach out via the in-app chat—we’ll quickly help you resolve it.
Create a dedicated map page
If you want to add the map to a new page that’s just there for the map, you first have to add a new template. Follow the steps below or watch this video.
Step by step
- In Shopify click on Online Store
- Next to your current theme click on customize
- At the top you can select which page or template of the store you want to edit. Click on pages → create template. Give it a name (e.g. Map Template). Click Create Template.
- Now you are editing this new template. You can add anything you want. Titles, styles, images and so on.
- To add the Store Locator, click on add section > choose „Apps“. Here you will see the MapMigo App block. Click on it and the store locator will be added to the template.
You can’t edit any settings in the app block. All customization is done in the settings of the app itself. If anything doesn’t work or look right, just reach out via the in-app chat—we’ll quickly help you resolve it. - Save the changes.
- Next you have to create a new page and assign it to the template. So exit the theme editor.
- In Shopify go to online store → pages → add page → Give it a name → on the right select the template you just created for the map page → Set the visibility of the page to public → save.
- Now the custom map page is live. Feel free to add it to one of your navigations, so that your users can find this page.